At present, one of the most pressing challenges in LED lighting technology remains the issue of heat dissipation. Heat generation from LEDs and electrolytic capacitors poses significant risks to the longevity of LED lighting systems, often leading to premature failure of light sources. Efficient heat management is crucial for ensuring that the internal temperatures within LED lamps remain stable, thereby protecting the power supply from operating in excessively hot conditions. This proactive approach can help prevent the degradation of LED light sources caused by prolonged exposure to high temperatures.
LEDs themselves do not emit infrared or ultraviolet rays, meaning they lack any inherent radiation-based heat dissipation capabilities. As such, the effectiveness of LED lighting fixtures in managing heat relies heavily on the heat sink, which must effectively conduct, convect, and radiate heat away from the LED components. A heat sink’s primary responsibility is not just to transfer heat from the source to its surface but also to dissipate this heat into the surrounding air through convection and radiation. While thermal conduction plays a role in establishing the initial heat transfer pathway, the majority of the dissipation occurs via convection. The performance of a heat sink largely depends on its surface area, geometry, and the strength of natural convection currents. If the distance between the heat source and the heat sink's surface is less than 5 mm, materials with a thermal conductivity greater than 5 will suffice for efficient heat transfer, but convection remains the dominant mechanism beyond this point.
Most contemporary LED lighting solutions utilize low-voltage (VF = 3.2V) and high-current (IF = 200-700mA) LED chips, which generate substantial amounts of heat during operation. Consequently, heat sinks made from high-conductivity aluminum alloys like die-cast aluminum, extruded aluminum, and stamped aluminum are typically employed. Die-cast aluminum heat sinks are manufactured using pressure casting techniques, where molten zinc-copper-aluminum alloys are injected into specially designed molds and solidified under high pressure to form the desired shape.
Let us now compare these different types of heat sinks:
**Die-Cast Aluminum Heat Sinks:**
These are cost-effective to produce, but their heat dissipation fins cannot be made too thin, limiting the overall heat dissipation area. Common materials include ADC10 and ADC12.
**Extruded Aluminum Heat Sinks:**
This process involves forcing liquid aluminum through a fixed mold to create a bar, which is then machined into the desired heat sink shape. The fins can be made very thin, maximizing the heat dissipation area. Air convection naturally forms when these fins work, enhancing heat dissipation. Common materials include AL6061 and AL6063.
**Stamped Aluminum Heat Sinks:**
Produced by punching and drawing steel and aluminum alloy sheets, stamped heat sinks are lightweight and have a smooth surface without fins. They use materials like 5052, 6061, and 6063. Their small size and high material utilization make them a low-cost option. However, they are best suited for isolated switching constant current power supplies, requiring additional structural designs to meet safety certifications like CE or UL.
**Plastic-Coated Aluminum Heat Sinks:**
These consist of a thermally conductive plastic shell enclosing an aluminum core. The core transfers heat to the plastic, which radiates heat through its multi-wings. Black-colored plastic-coated aluminum heat sinks offer better radiation performance. Made from thermally conductive plastics, they are flexible, lightweight, and cost-effective. They also provide excellent insulation, making them compliant with safety regulations.
**High Thermal Conductivity Plastic Heat Sinks:**
Recently developed, these all-plastic heat sinks have thermal conductivities several times higher than regular plastics, reaching up to 2-9 W/mK. Suitable for non-isolated switching constant current power supplies, they excel in both heat conduction and radiation. These materials are environmentally friendly, fully degradable, and free from heavy metals or chemical pollution. They are lightweight, with a density half that of aluminum, reducing weight significantly. With high voltage resistance (up to 6000V AC), they pass stringent safety tests like CE and UL. Their design flexibility allows for innovative shapes and improved production efficiency.
In conclusion, while each type of heat sink offers unique advantages, high thermal conductivity plastic heat sinks stand out for their balance of performance, cost, and sustainability, making them ideal for modern LED applications.
Digital Timer Switch Socket
Instruction Manual
1. Features
Clock display, 10 sets of adjustable timed power control, randomized power control, manual switch and optional DST setup.
2. First time charging
This timer contains a rechargeable battery. It is normal that the new/old model runs out of battery if it wasn`t being charged for a long period of time. In this case, the screen will not turn on.
To charge : simply plug the timer to a power outlet. The charging time should take at least 15 minutes.
If the screen doesn`t light up or displays garbled characters, simply reboot the system by pressing the [RESET" button.
3. Set clock
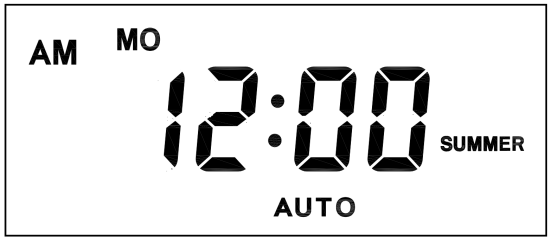
Hold [CLOCK" button and [WEEK" button to adjust week.
Hold [CLOCK" button and [HOUR" button to adjust hour.
Hold [CLOCK" button and [MINUTE" button to adjust minute.
Hold [CLOCK" button and [TIMER" button to select 12 hour/24 hour display.
Hold [CLOCK" button and [ON/AUTO/OFF" button to enable/disable DST (daylight-saving-time).
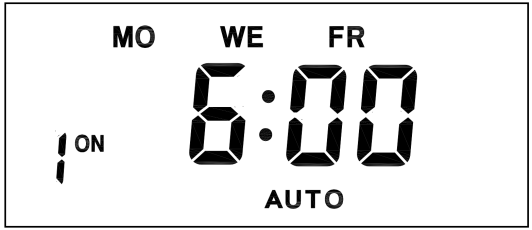
4. Set timer
Press [TIMER" button, select and set timer. Setting rotation : 1on, 1off, 2on, 2off, ...... , 10on, 10off.
Press [HOUR" button to set hour for timer.
Press [MIN" button to set minute for timer.
Press [WEEK" button to set weekday for timer. Multiple weekdays can be selected. ex: if selected [MO", the timer will only apply on every Monday; if selected [ MO, WE, FR", the timer will apply on every Monday, Wednesday and Friday.
Press [RES/RCL" button to cancel the selected on or off timer. The screen will show "-- -- : -- --" , the timer is canceled.
Press [RES/RCL" button again to reactivate the timer.

When timers are set, press [CLOCK" to quit timer setting and return to clock.
5. Random function

Press [RANDOM" button to activate random function, press again to cancel function.
System only runs random function when [AUTO" is on.
Random function will automatically start the timer from 2 to 32 minutes after the setting.
ex : if timer 1on was set to 19:30 with the random function on, the timer will activate randomly between 19:33 to 20:03.
if timer 1off was set to 23:00 with the random function on, the timer will activate randomly between 23:02 to 23:32.
To avoid overlapping, make sure to leave a minimum of 31 minutes gap between different sets of timer.
6. Manual control
Displayed features:
ON : socket turns on.
OFF : socket turns off.
AUTO : socket turns on/off automatically via timer.
Manual ON setting
Press [ON/AUTO/OFF" button to switch from [AUTO" to [ON".
This mode allows socket of the device to power up. Power indicator will light up.
Manual OFF setting
Press [ON/AUTO/OFF" button to switch from [AUTO" to [OFF".
This mode turns socket of the device off. Power indicators will turn off.
7. Electrical parameters
Operating voltage : 230VAC
Battery : NiMh 1.2V
Power consumption : < 0.9W
Response time : 1 minute
Power output : 230VAC/16A/3680W
Q&A
Q: Why won`t my timer turn on?
A: It`s out of battery, you can charge the timer by plugging onto any power outlet. Charge the device for at least 15 minutes. Then press [RESET " button to reset the device.
Q: Can I set seconds of the timer?
A: No, the smallest time unit is minute.
Q: Does my timer keeps old settings without being plugged onto a power outlet?
A: Yes, the timer has an internal battery, it allows the timer to save settings without a power outlet.
Q: Is the battery rechargeable?
A: Yes, the battery is rechargeable. We recommend to charge it for 4 hours so the battery is fully charged.
Q: Does the timer needs internet connection?
A: The timer does not need internet.
Q: Does the screen have back light function?
A: It doesn`t support back light.
Digital Timer Socket, Timing Switch Socket, Electronic Timer Socket, Timer Socket
NINGBO COWELL ELECTRONICS & TECHNOLOGY CO., LTD , https://www.cowellsockets.com